How to Resize Images Correctly, Without Losing Quality
A photo that looks sharp on a phone can turn blurry the moment it's uploaded somewhere with different size requirements: a website rejecting it as too large, a print coming out pixelated, a social media platform cropping it awkwardly. The image hasn't changed. What's missing is understanding how resizing actually works.
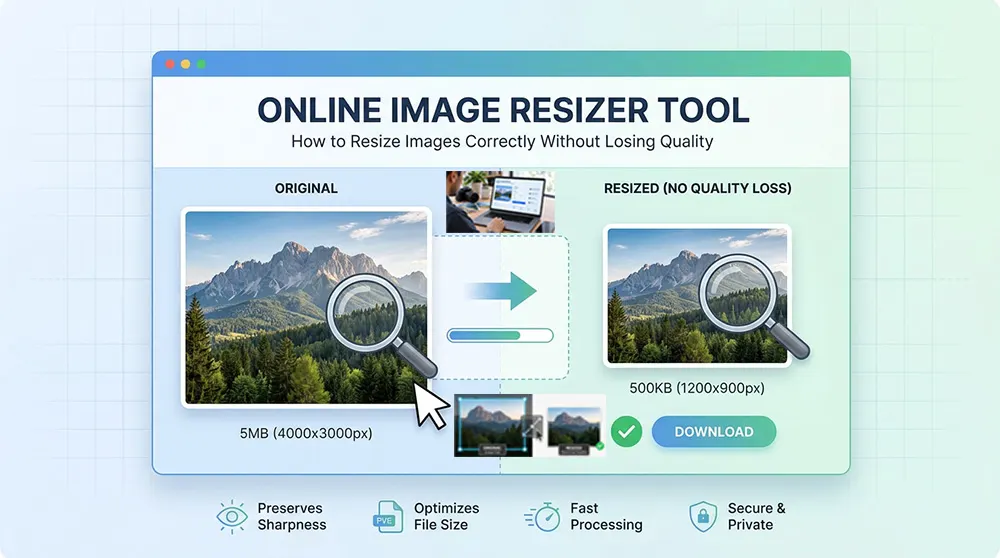
An image resizer adjusts an image's dimensions, file size, or both, ideally without visibly damaging quality in the process. The difference between a resized image that still looks sharp and one that looks like a smudged mess almost always comes down to understanding a few specific technical distinctions, not the specific tool being used.
This guide covers the difference between resizing and compression, how a resizer actually decides what happens to each pixel, why enlarging an image is riskier than shrinking it, the role of DPI in print work, and the mistakes that most often produce a disappointing result.
Resizing vs. Compression
The Distinction That Matters Most
These two terms get used interchangeably constantly, and they describe genuinely different operations. Confusing them is the single most common reason people end up with the wrong kind of result.
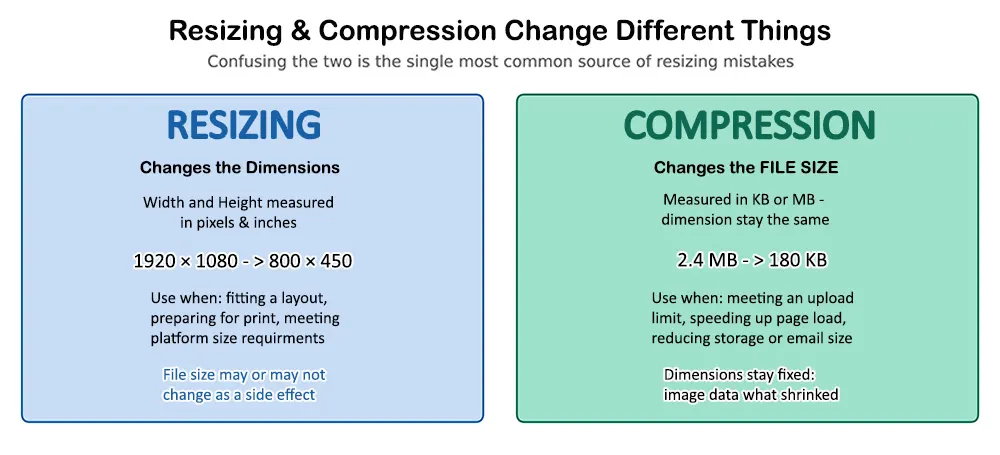
Figure 1: Resizing changes an image's width and height. Compression changes its file size, typically by reducing image data. A tool can do either independently, or both together.
Resizing changes an image's dimensions width and height- measured in pixels or physical units like inches. Compression changes the file size, measured in kilobytes or megabytes, typically by reducing the amount of image data stored, without necessarily touching the dimensions at all.
A tool built to hit a specific target get this under 200 KB, for instance is usually doing both at once: adjusting dimensions and compression together to land on a file that's small enough while still looking acceptable. Knowing which one an actual problem calls for is the first step to getting a usable result rather than a disappointing one.
How an Image Resizer Actually Works
Clicking 'resize' looks instant, but the tool is doing real work underneath: recalculating what every pixel in the new image should look like, based on the pixels in the original. This process is called interpolation, and it behaves differently depending on whether the image is getting smaller or larger.
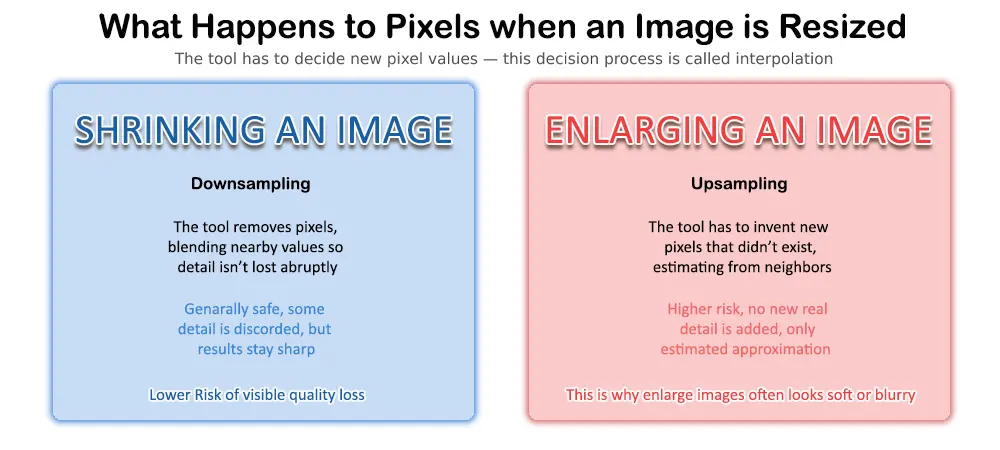
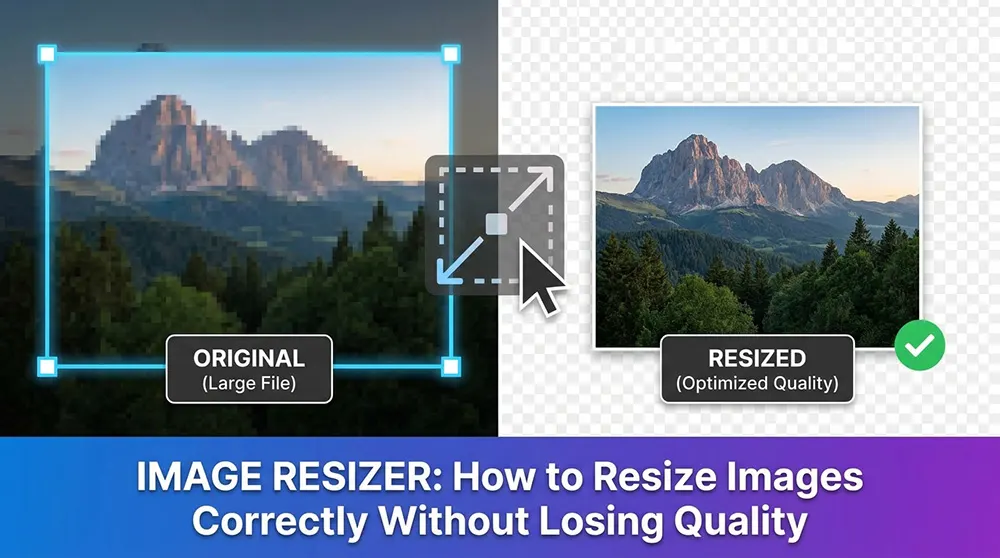
Figure 2: Shrinking an image is a relatively safe operation — the tool blends existing pixel data down. Enlarging is riskier, because the tool has to invent pixel values that were never actually captured, which is why upscaled images often look soft.
When an image is shrunk, the tool removes pixels while blending nearby values to preserve as much visual detail as reasonably possible, a process called downsampling. When an image is enlarged, the tool has no real data to work with for the new pixels being added; it estimates them based on surrounding values, a process called upsampling. That estimation is fundamentally different from having actual captured detail, which is why an enlarged image often looks noticeably softer than the original, no matter how good the algorithm is.
Higher-quality tools use more sophisticated interpolation methods, such as bicubic scaling, or increasingly, AI-based upscaling that attempts to reconstruct plausible detail rather than just averaging nearby pixels. These produce better results than basic scaling, particularly when enlarging, but none can add detail that was never captured in the first place.
Pixels, Resolution, and Dimensions
These three terms get used loosely, and the confusion causes real problems, particularly for anyone preparing images for print.
Pixels are the individual building blocks of a digital image. An image described as 1920x1080 is 1920 pixels wide and 1080 pixels tall; more pixels generally means more captured detail.
Resolution describes how densely those pixels are packed, typically measured in DPI (dots per inch). This is where the screen-versus-print distinction becomes genuinely important.
Dimensions can be expressed in pixels, inches, or centimeters depending on the context: pixels for screen use, inches for print, where both physical size and pixel density must be correct simultaneously.
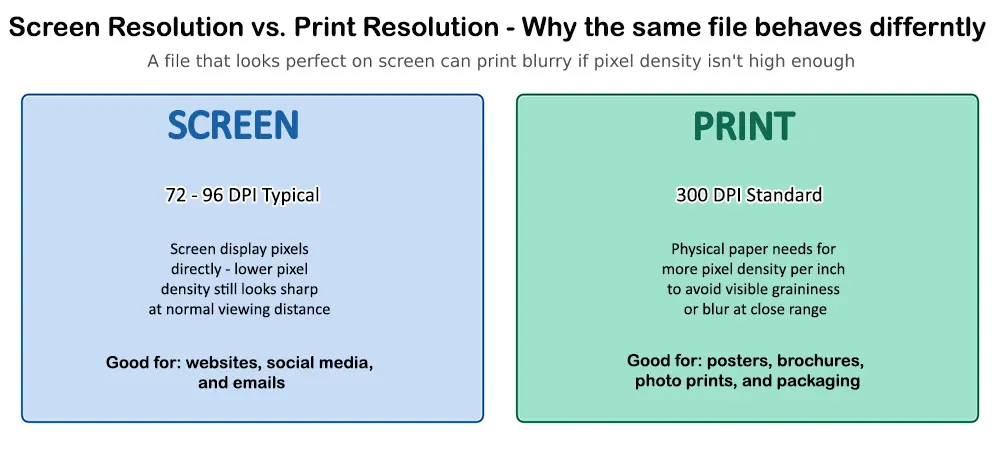
Figure 3: The same pixel count behaves very differently depending on the medium. 72-96 DPI is standard for screens; 300 DPI is the standard for quality print output — a file optimized for one will often disappoint in the other.
The most common mistake here is increasing an image's dimensions without any corresponding increase in pixel data, stretching a small image to fill a larger space. The result looks the same way a heavily zoomed-in low-quality photo does: bigger, but not more detailed. Bigger and sharper are not the same thing.
Resizing by Pixels, File Size, or Physical Dimensions
Different situations call for resizing by a different unit, and using the wrong one produces a technically 'resized' image that still doesn't solve the actual problem.
By pixels is the right choice for digital layouts: websites, social media posts, banners, anywhere a specific pixel footprint is required.
By file size (KB or MB), the right choice when there's an upload limit or a page-speed target to hit, such as an email attachment cap or a website's image weight budget.
By physical dimensions (inches or centimeters), the right choice for print work, where both the physical size and the underlying pixel density need to be correct for the output to look sharp.
Tools that combine all three, letting a target like 'under 200 KB' or 'exactly 8x10 inches at 300 DPI' drive the settings automatically, remove the guesswork of manually balancing dimensions, resolution, and compression against each other.
Maintaining Aspect Ratio
Aspect ratio is the proportional relationship between an image's width and height. Changing one dimension without proportionally adjusting the other stretches or squishes the image a distortion that's usually immediately obvious and rarely intentional.
Most resizing tools include a 'lock aspect ratio' option, and it should generally stay enabled unless there's a specific reason to crop or intentionally alter proportions. For situations that genuinely need different proportions, such as fitting a square product photo into a wide banner space, for instance, cropping is the correct tool, not stretching. Cropping removes part of the image to fit new proportions without distorting what remains; stretching distorts everything to force a fit.
Choosing the Right File Format
Saving a detailed photograph as a low-quality JPEG produces visible compression artifacts. Saving a large photograph as a PNG produces an unnecessarily bloated file, since PNG's lossless approach isn't suited to photographic complexity. Matching format to content is a small decision that meaningfully affects both quality and file size.
Batch Resizing for Multiple Images
Resizing one image at a time is fine for occasional use. Anyone managing dozens or hundreds of images a product catalog, a photography portfolio, a content library needs batch processing: applying the same dimensions, format, or file size target across an entire group of images in one pass.
Beyond the time saved, batch processing produces consistency that manual resizing struggles to maintain, with every image in a set ending up with matching dimensions and quality settings, which matters visually for anything displayed as a group, like a product grid on an e-commerce site. Some batch tools go further, supporting renaming and format conversion within the same pass, turning a resizing task into a full image library cleanup.
Online Tools vs. Offline Software
Online tools require no installation, work from any device with a browser, and are usually free, well suited to quick, occasional tasks like resizing for an email attachment or a social media post. The trade-offs are real: file size limits on some platforms, a need for internet access, and a legitimate privacy consideration for sensitive images being uploaded to a third-party server.
Offline software, desktop applications, and dedicated apps trade convenience for control. Everything processes locally, removing both the upload-speed dependency and the privacy concern of sending images elsewhere. Windows' built-in Image Resizer PowerToys utility adds right-click resizing directly in File Explorer; Mac's Preview app handles basic resizing without any additional software; dedicated professional tools offer more advanced scaling algorithms than most free online options provide.
Common Resizing Mistakes
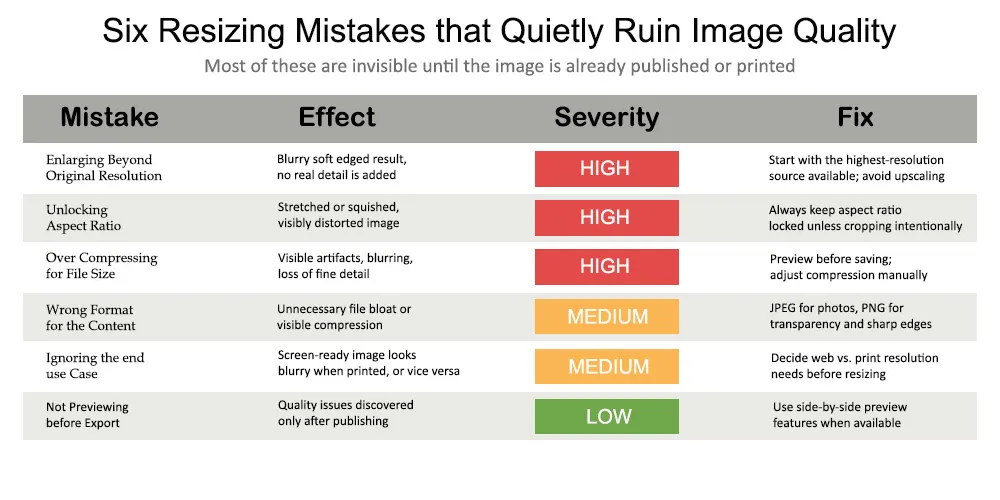
Figure 4: The mistakes that most often turn a resizing task into a disappointing result — several of them invisible until the image is already published or printed.
Enlarging beyond the original resolution produces a soft, blurry result, since no interpolation method can add detail that was never captured in the source image.
Unlocking aspect ratio, usually by accident, produces visibly stretched or squished proportions.
Over-compressing to hit a small file size introduces visible artifacts and softens fine detail; a good rule is to preview the result before committing rather than trusting an aggressive compression setting blindly.
Using the wrong format for the content JPEG for graphics with sharp edges, or PNG for photographs produces either visible artifacts or unnecessarily large files.
Image Resizing for Website Speed and SEO
Large, unoptimized images are one of the most common causes of slow-loading web pages, and page speed is a factor search engines weigh when ranking results. Reducing image file size through resizing, compression, or both is one of the more straightforward, high-impact improvements available for a slow site.
Beyond raw speed, search engines rely on contextual signals to understand what an image represents: descriptive file names ('image-resizer-comparison.jpg' rather than 'IMG4821.jpg') and alt text, which also serves an accessibility function independent of any SEO benefit. Pairing correctly resized images with descriptive file names and alt text is a combination that supports both page speed and search visibility at once not a magic bullet on its own, but a genuinely useful, low-effort habit.
Comparing Image Resizer Options
Frequently Asked Questions
How do I resize an image without losing quality?
Use a tool with good interpolation (bicubic or AI-based scaling), keep aspect ratio locked, avoid enlarging beyond the original resolution, and preview the result before saving rather than trusting compression settings blindly.
Is resizing the same as compressing an image?
No. Resizing changes dimensions width and height. Compression changes file size, typically by reducing image data. They're often used together, but they solve different problems and shouldn't be treated as interchangeable.
What is the ideal image size for a website?
It depends on the layout, but keeping images under roughly 200 KB where possible is a reasonable general target for balancing quality and page load speed. The exact right number depends on how the image is used and how many appear on a given page.
Can I resize an image to a specific file size, like under 500 KB?
Yes, many tools accept a target file size directly and automatically adjust compression and, if needed, dimensions to reach it. This is generally more convenient than manually guessing at compression percentages.
Why does an enlarged image look blurry?
Because enlarging requires the tool to invent pixel values that were never actually captured, estimating them from surrounding pixels rather than working with real detail. No interpolation method, however advanced, can fully substitute for pixel data that doesn't exist in the source image.
Conclusion
Resizing an image well comes down to a handful of distinctions that are easy to state and easy to forget in practice: resizing changes dimensions, compression changes file size, shrinking is safer than enlarging, and aspect ratio should stay locked unless cropping is the actual intent.
The tool matters less than understanding what it's actually doing. A free online resizer used with these principles will consistently outperform an expensive professional tool used carelessly. Preview before saving, match the format to the content, and resize for the actual end-use screen or print rather than treating every image the same way regardless of where it's headed.
Handled with that level of attention, resizing stops being a source of frustration and becomes what it's supposed to be: a fast, reliable step that makes images fit their purpose without sacrificing the quality that made them worth using in the first place.